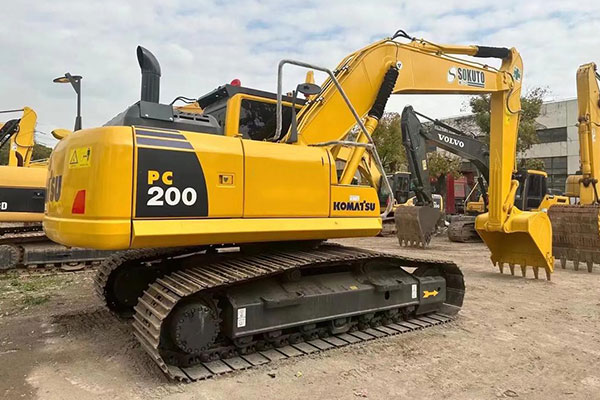



Buying a used excavator can save thousands of dollars compared to purchasing a new machine. However, a poorly maintained excavator may lead to costly repairs, downtime, and reduced productivity. Whether you are a contractor, construction company, equipment dealer, or first-time buyer, conducting a thorough used excavator inspection is essential before making a purchase.
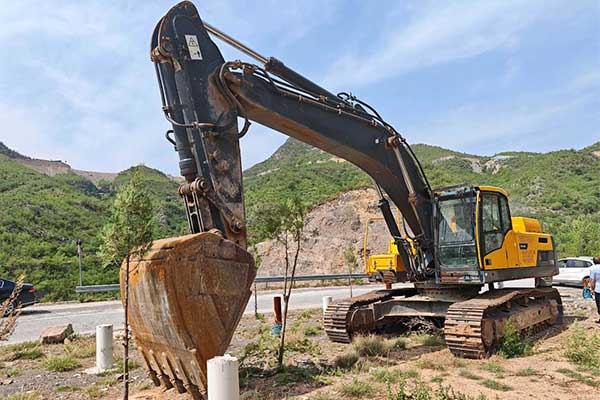
Why Inspect a Used Excavator?
A detailed inspection helps you:
- Avoid expensive repair costs
- Identify hidden mechanical issues
- Verify machine value and condition
- Negotiate a better purchase price
- Reduce operational risks after purchase
Even if the machine appears clean and functional, underlying problems may exist that are not immediately visible.
Used Excavator Inspection Step
Step 1: Check the Machine’s Documentation
Start by reviewing the excavator’s documentation. Important records such as the maintenance history, ownership documents, and repair records can provide valuable insight into the machine’s condition and reliability.
Step 2: Inspect the Overall Condition
A visual inspection can reveal how well the excavator has been maintained. Look for signs of rust, structural cracks, damaged panels, missing parts, or poor-quality repairs. Fresh paint may improve appearance, but it can sometimes hide previous damage.
Step 3: Examine the Undercarriage
The undercarriage is one of the most expensive components to repair or replace. Inspect the tracks, rollers, idlers, and sprockets for excessive wear, damage, or uneven wear patterns that may indicate maintenance issues.
Step 4: Inspect the Boom, Arm, and Bucket
Carefully check the boom, arm, and bucket for cracks, bends, or weld repairs. These components endure significant stress during operation, and structural damage can affect both safety and performance.
Step 5: Check Pins and Bushings
Pins and bushings naturally wear over time, but excessive wear can reduce digging precision and increase repair costs. Look for excessive movement, large gaps, or unusual noises around pivot points.
Step 6: Evaluate the Hydraulic System
The hydraulic system powers nearly every excavator function. Inspect hoses, cylinders, and connections for leaks, damage, or signs of wear. During operation, the hydraulics should respond smoothly without hesitation.
Step 7: Inspect the Engine
Check the engine for oil leaks, coolant leaks, unusual noises, and excessive exhaust smoke. A healthy engine should start easily, idle smoothly, and maintain consistent performance under load.
Step 8: Check the Cooling System
A properly functioning cooling system helps prevent overheating and costly engine repairs. Inspect the radiator, coolant levels, hoses, and cooling fan to ensure everything is operating correctly.
Step 9: Inspect the Cab
The condition of the cab often reflects how the machine has been treated. Verify that the controls, display panel, seat, air conditioning system, and safety equipment are all functioning properly.
Step 10: Test the Electrical System
Inspect the battery, lights, display monitor, switches, and wiring connections. Electrical issues can be difficult to diagnose, so it’s important to confirm that all systems operate as expected.
Step 11: Verify Machine Hours
Machine hours can help estimate wear and remaining service life. Compare the hour meter reading with the overall condition of the excavator and any available maintenance records.
Step 12: Perform an Operational Test
Always operate the excavator before purchase. Test the boom, bucket, swing system, and travel functions to ensure smooth performance without unusual noises, vibrations, or delays.
Step 13: Look for Fluid Leaks
After operating the machine, inspect it for hydraulic oil, engine oil, coolant, or gear oil leaks. Even small leaks can indicate underlying maintenance problems.
Step 14: Inspect Final Drives and Travel Motors
Final drives and travel motors are critical drivetrain components. Check for oil leaks, unusual sounds, overheating, and smooth travel performance during operation.
Step 15: Consider a Professional Inspection
For high-value purchases, hiring a professional inspector can provide additional confidence. An expert evaluation may identify hidden issues that are difficult to detect during a standard visual inspection.
Common Red Flags When Buying a Used Excavator
Be cautious if you notice:
- Major structural cracks
- Heavy hydraulic leaks
- Excessive engine smoke
- Severe undercarriage wear
- Overheating issues
- Unusual operating noises
- Inconsistent hour readings
These problems may lead to significant repair expenses after purchase.
Quick Used Excavator Inspection Checklist
Before finalizing your purchase, verify the following:
- Documentation is available
- Engine starts and runs smoothly
- Hydraulics operate properly
- No major structural damage
- Undercarriage condition is acceptable
- Pins and bushings show minimal wear
- Electrical systems function correctly
- No significant fluid leaks
- Travel motors operate normally
- Operational test completed
Frequently Asked Questions
The undercarriage and hydraulic system are typically the most expensive components to repair and should receive special attention.
There is no fixed limit. Condition and maintenance history are often more important than total operating hours.
Yes, provided it has been properly maintained and passes a comprehensive inspection.
For medium- and high-value excavators, professional inspections can help identify hidden issues and prevent costly purchasing mistakes.
Conclusion
A careful inspection is the best way to reduce risk when purchasing a used excavator. By checking the machine’s documentation, structure, engine, hydraulics, undercarriage, and operating performance, buyers can make informed decisions and avoid unexpected repair costs.
Whether you are purchasing a crawler excavator, mini excavator, or large construction machine, following this inspection guide can help you find equipment that delivers reliable performance and long-term value.